Tutorial for creating a CPA text ad
This is a tutorial to create a CPA Text Ad and it’s very easy. However, if you would like a retargeting feature for your site, please follow the retargeting tutorial before proceeding with the tutorial below.
This is a Text Ad demo if you need to know how does it display on the publisher’s site:
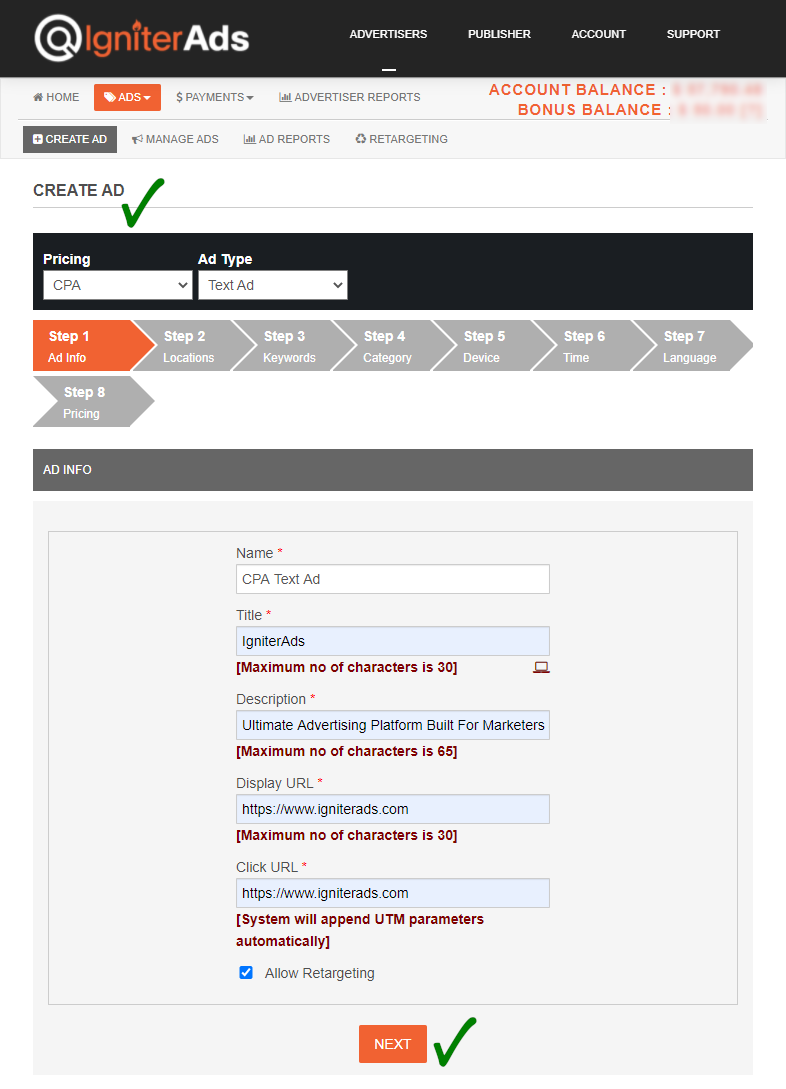
1. In the advertiser dashboard, select ADS and choose the CREATE AD button. Next, enter the information that is required to create a text ad. Then, click the NEXT button.
- Pricing – For text ad, choose CPA – Learn more.
- Ad Type – choose Text Ad
- Name – any name (will not be shown to the targeted user)
- Title – shown to the targeted user (maximum of 30 words)
- Description – shown to the targeted user (maximum of 65 words)
- Display Url – shown to the targeted user (maximum of 30 words)
- Click Url – your real Url, does not show to the targeted user but will redirect to the Url once they click it.
- Allow Retargeting – please tick if you would like to use the retargeting features
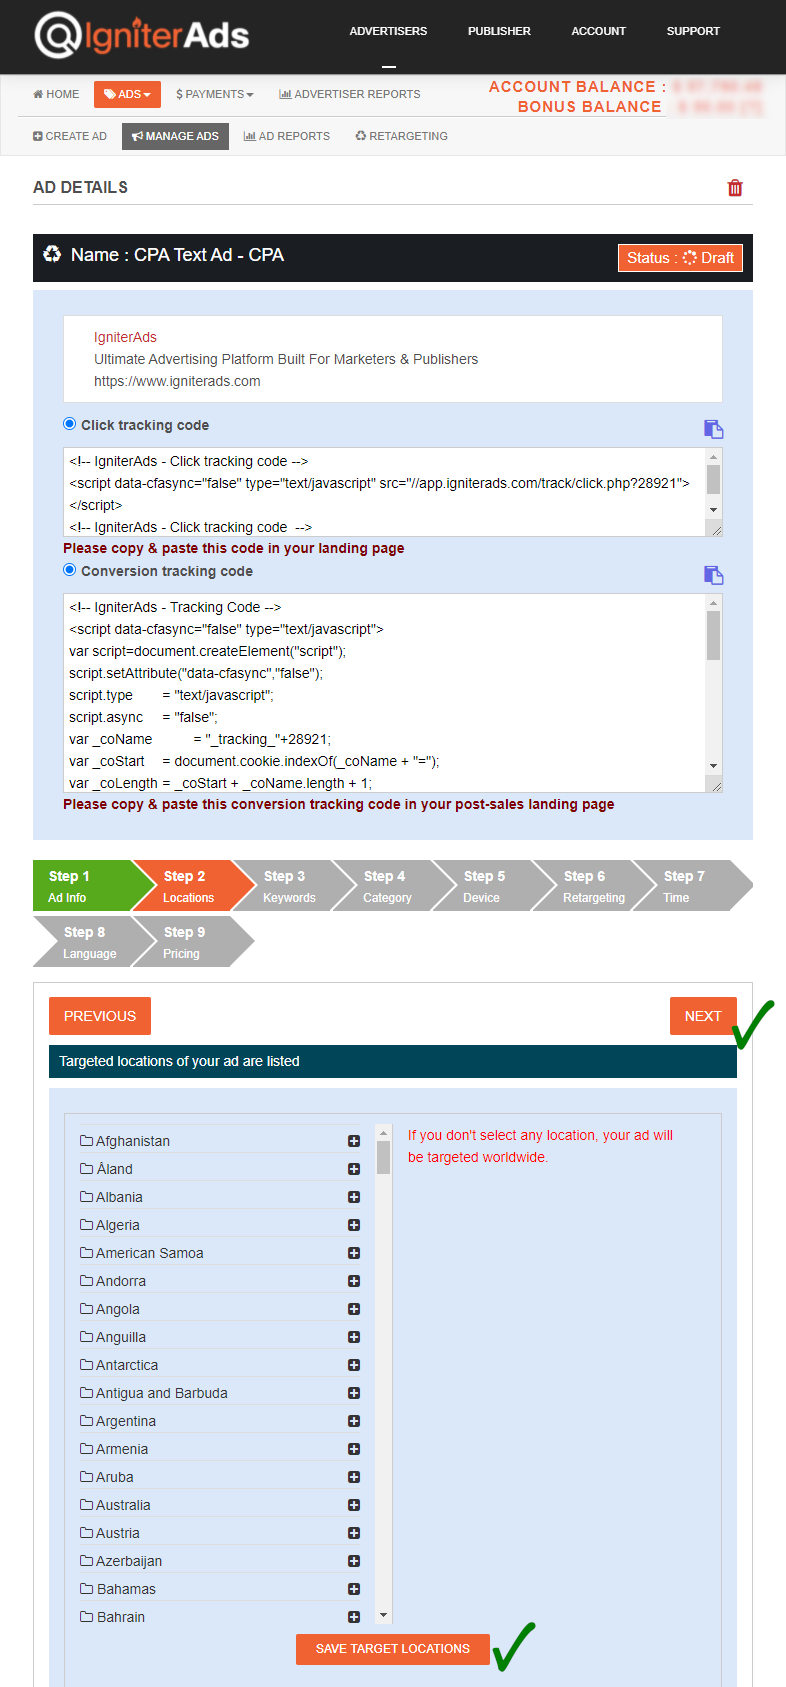
2. If you are targeting a specific country, state, province or any specific place, you can find the location by clicking the “+” button and click the SAVE TARGET LOCATIONS located at the bottom of the page. But if you target it worldwide, leave it as default and click the NEXT button to proceed.
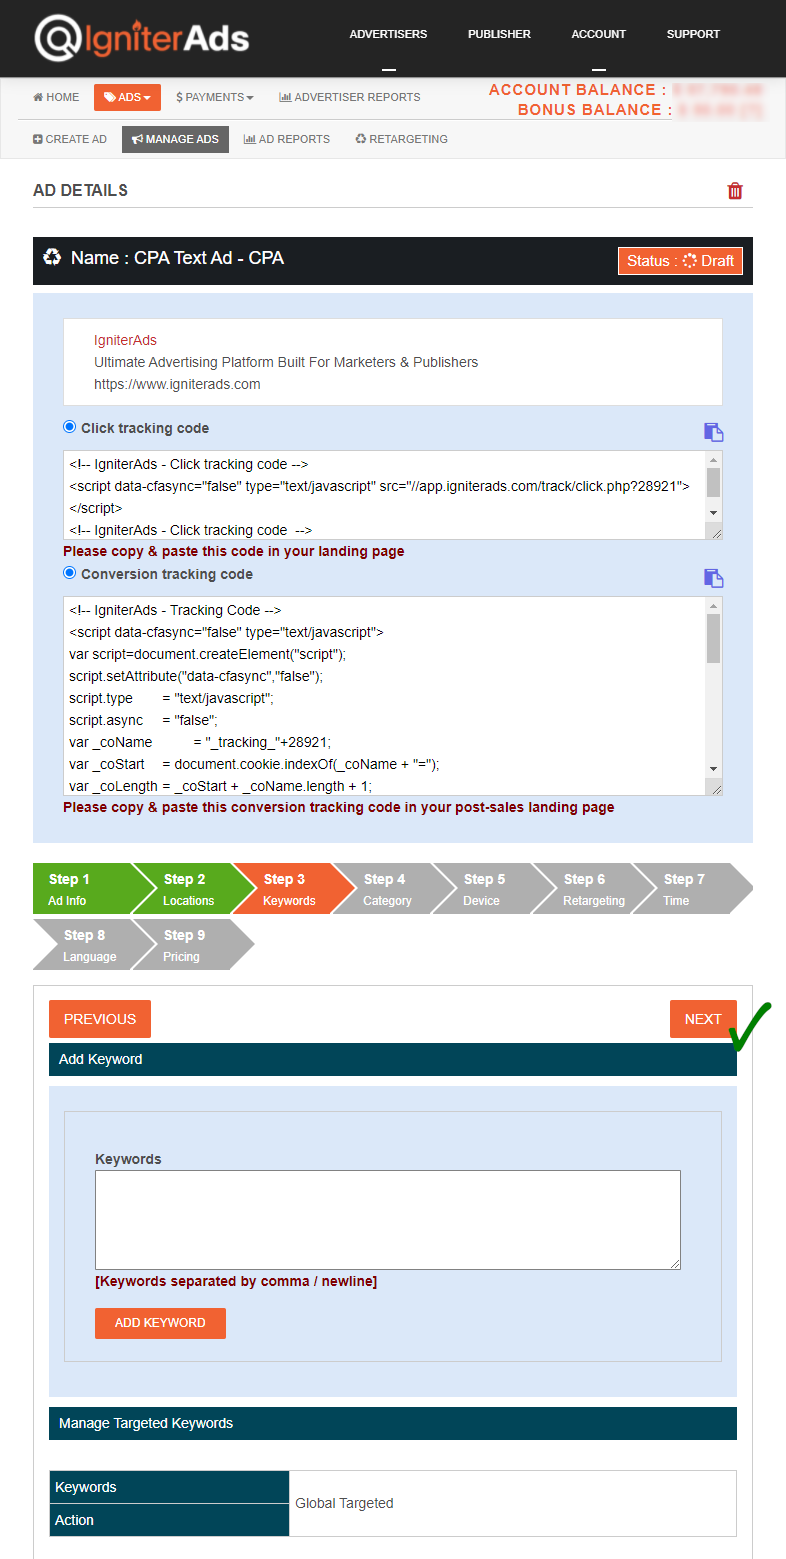
3. You can add the keyword here if you target a specific site based on keyword or niche. But if you target it for any keyword, leave it as default and click the NEXT button to proceed.
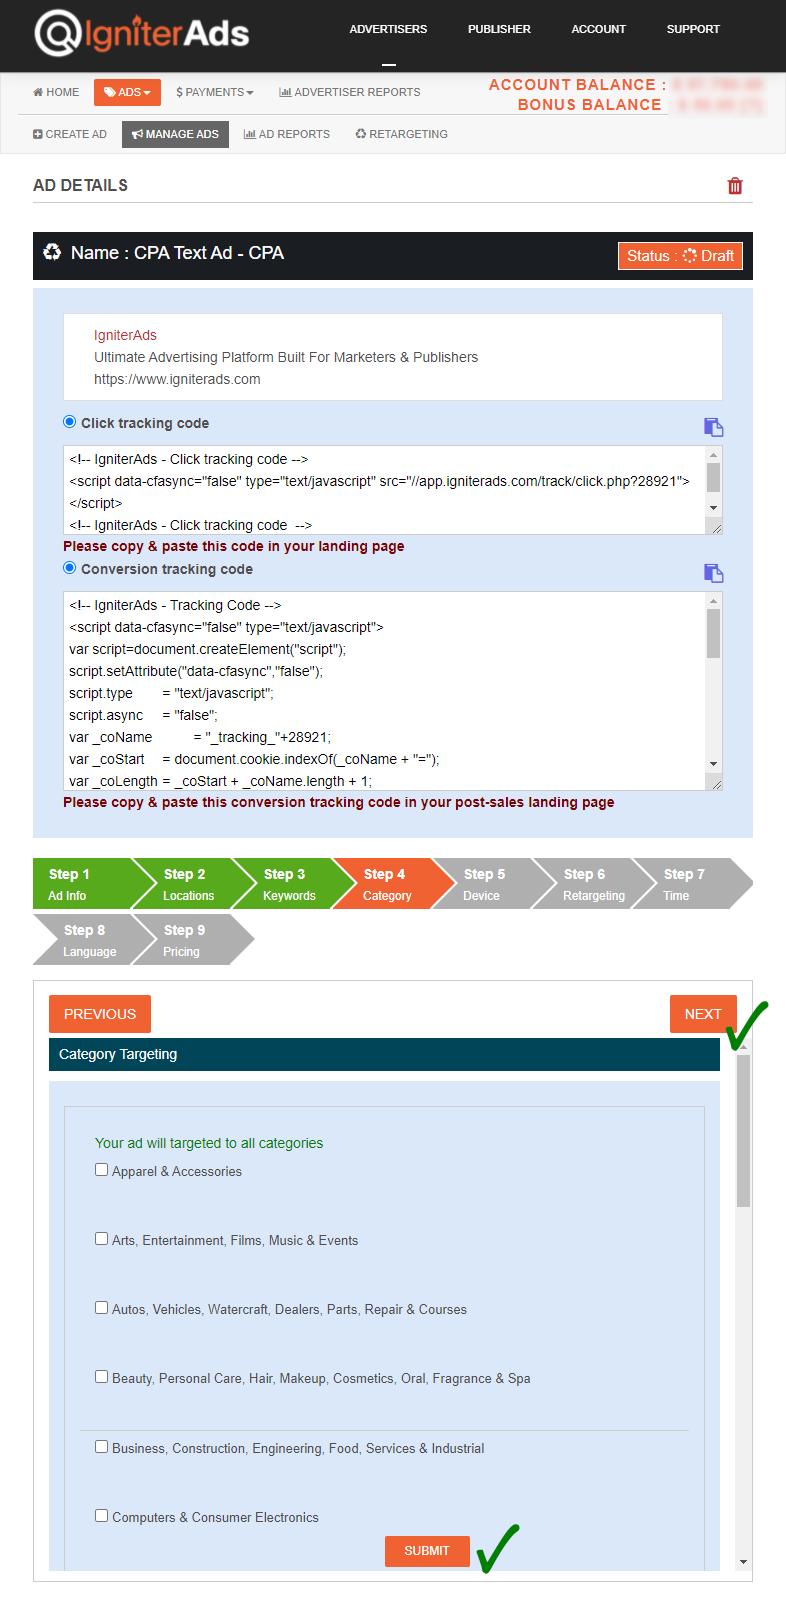
4. Do you want to target your ad to a specific category of a site? Choose it below and click the SUBMIT button. You can also choose more than one category. Else, if you target it for any category, leave it as default and click the NEXT button to proceed.
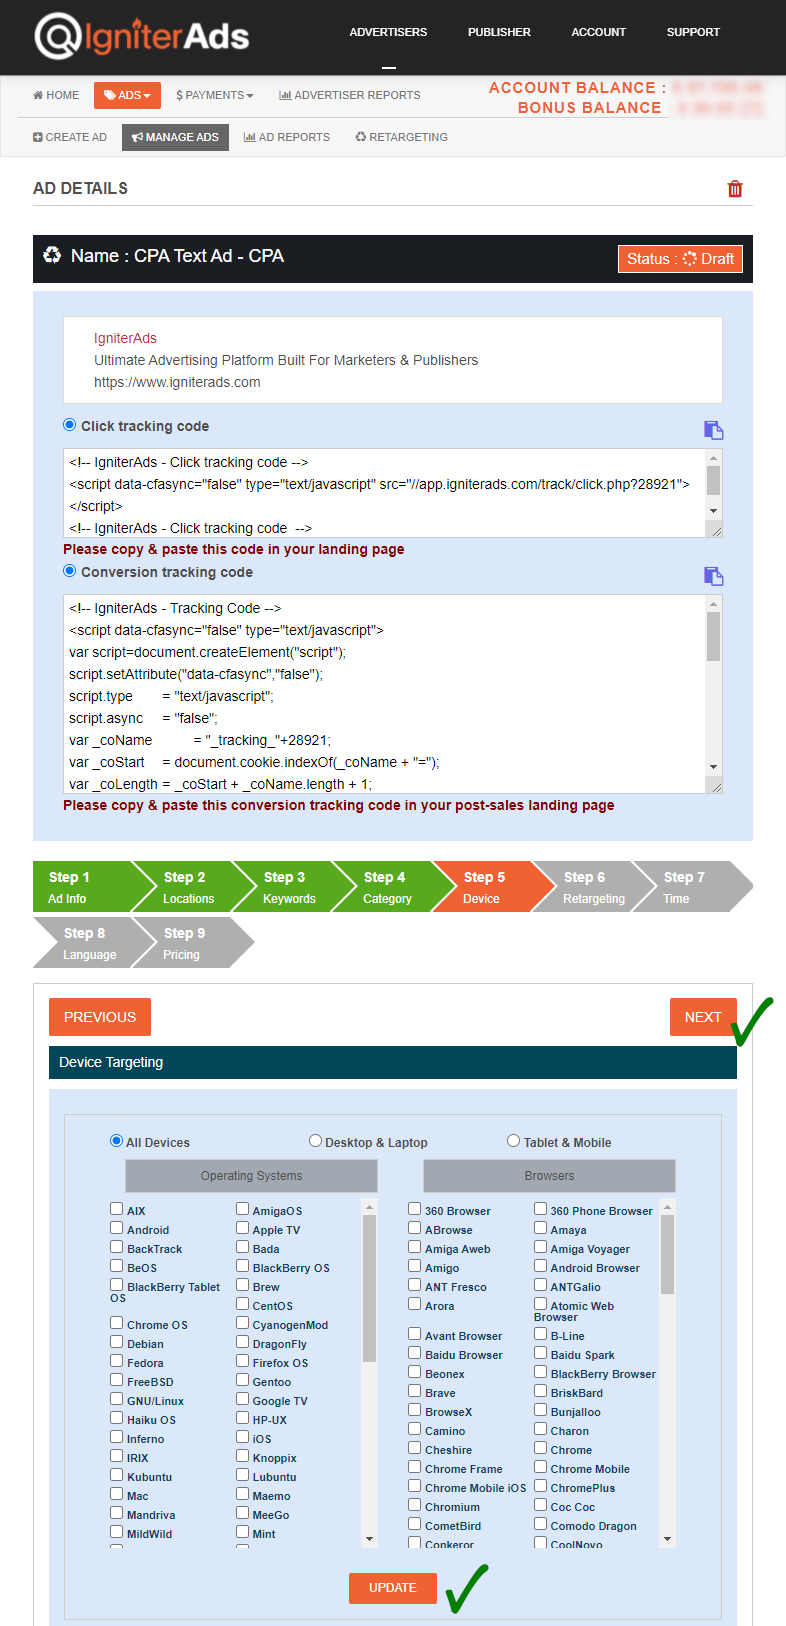
5. You can target the text ad to either a desktop/laptop user or a tablet/mobile user.
- All Devices – targeted for both desktop/laptop and tablet/mobile user. You can also choose a specific Operating System and Browser (please choose the Operating System first before choosing a Browser or else, leave all uncheck).
- Desktop & Laptop – only targeted for desktop and laptop users. You can also choose a specific Operating System and Browser (please choose the Operating System first before choosing a Browser or else, leave all uncheck).
- Tablet & Mobile – only targeted for tablet and mobile users. You can also choose a specific Operating System and Browser (please choose the Operating System first before choosing a Browser or else, leave all uncheck).
Please click the UPDATE button before clicking the NEXT button to proceed.
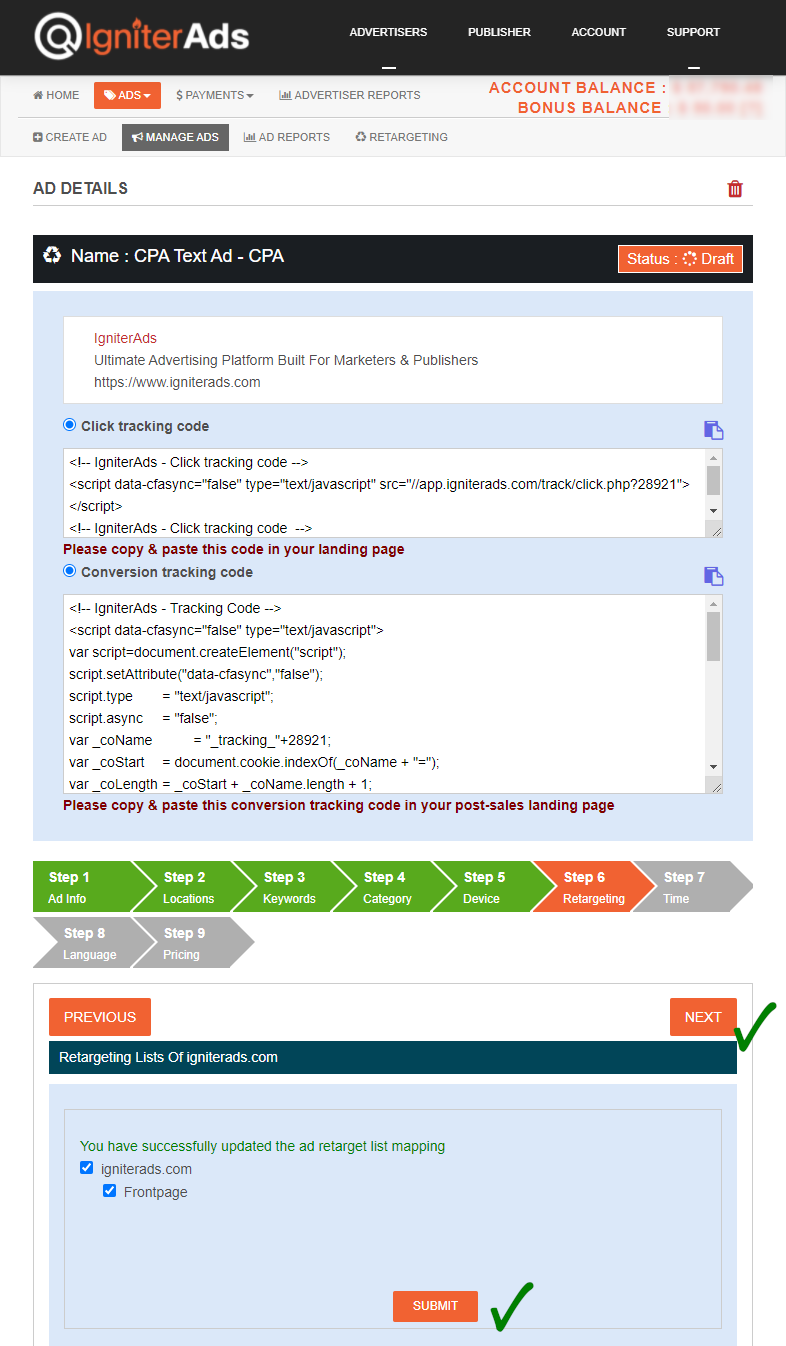
6. This step is a retargeting feature. As we mention before, you need to enable retargeting for your site. Else, your site will not be displayed in the image below. You can also retarget a specific page of your sites, such as a shop page, catalogue page or product page. Please click the SUBMIT button before clicking the NEXT button to proceed.
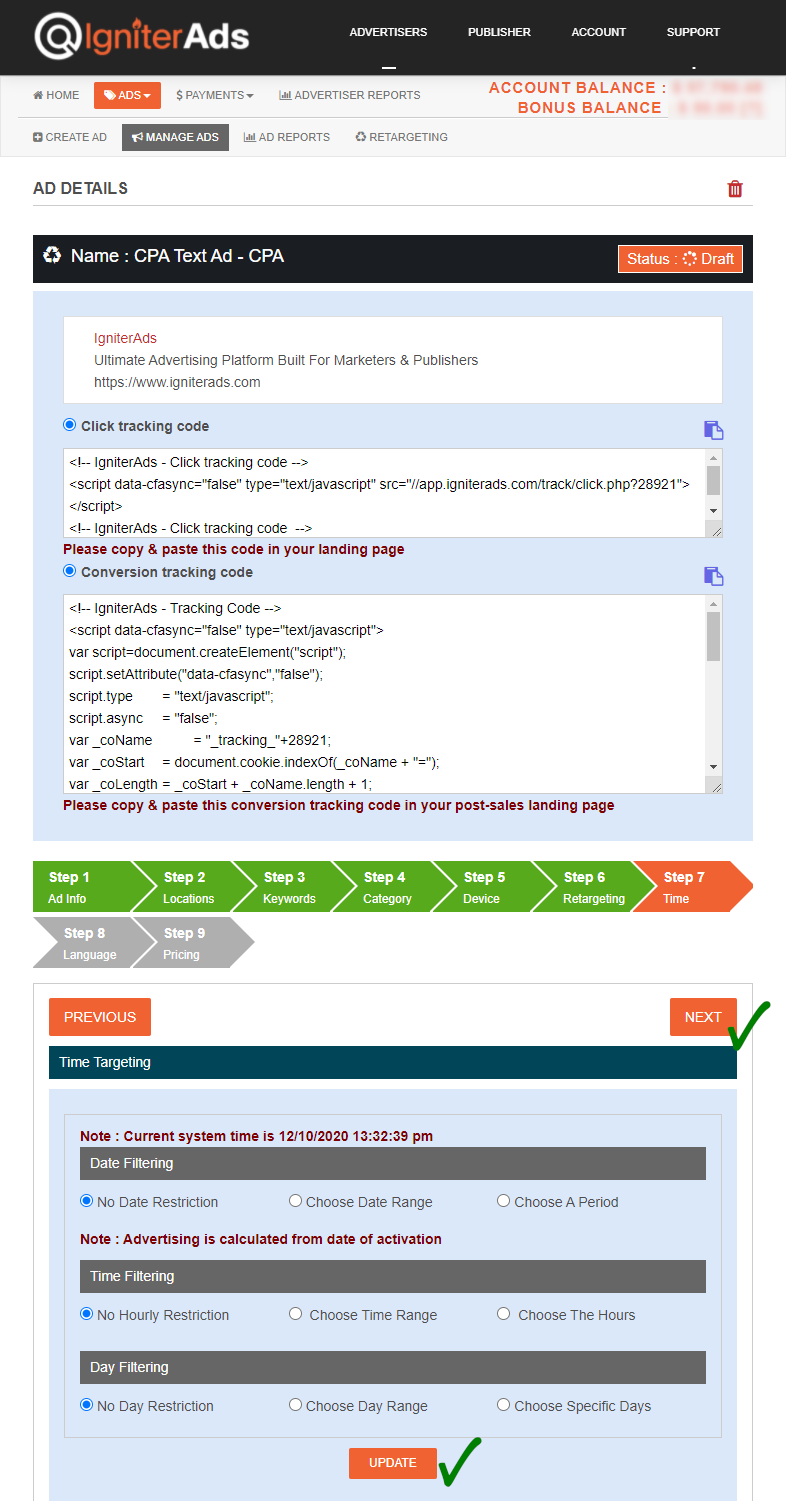
7. We advise you to use a time targeting feature for your site. Target between 8.00 am to 10.00 pm in your local time. But if you want to create a branding awareness, leave it as default and click the NEXT button.
Note: Don’t forget to match our server time and your local time. For example, here, our server time is 31st May 2020 at 3.16 am and your local time is 9.16 pm (London, DST), so your ad will be running from 8.00 am to 10.00 pm (London local time). And the time that you need to choose in our dashboard will be from 3.00 pm to 5.00 am.
More example:
- 8.00am in London = 3.00pm (IgniterAds dashboard time)
- 8.00am in New York = 8.00pm (IgniterAds dashboard time)
- 8.00am in Singapore/Hong Kong/Malaysia = 8.00am (IgniterAds dashboard time)
- 8.00am in Dubai = 2.00pm (IgniterAds dashboard time)
Important Notes:
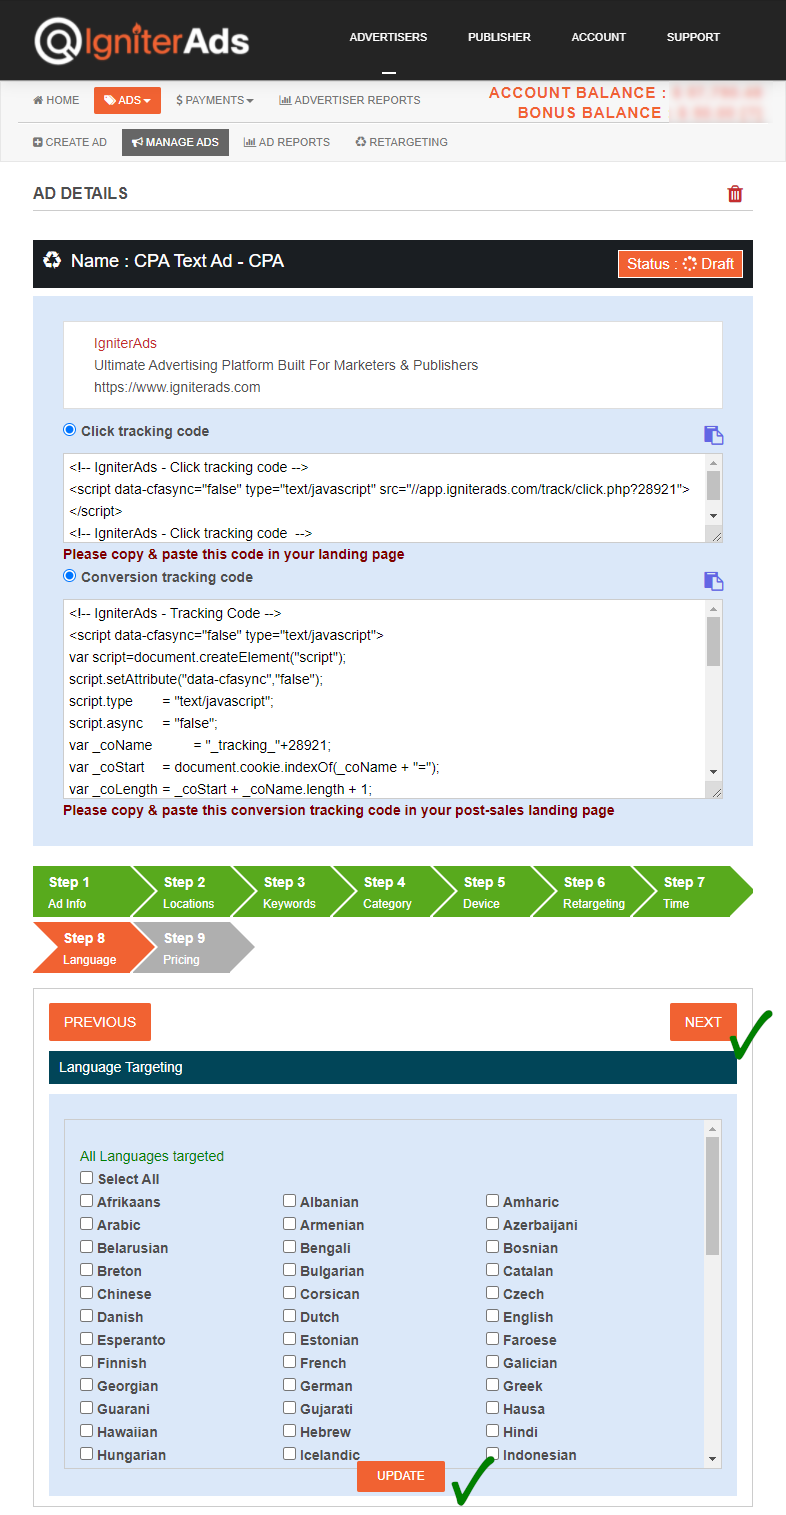
As of April 2019, we have added new targeting features in the step below. First, you can select your audience language. Leave it as default if you would like to target for all languages.
8. This is the final step. You need to enter your ad budget. The minimum CPA rate is USD$2.00 per sale, but we suggested you enter the Suggested Rate of USD$XX.XX to bid the other advertiser. The bidding rate of USD$XX.XX is too high? No worries. You can also input USD$2.00 per sale and the only difference is that your ad will be displayed after the highest bid ad made by other advertisers. Click the ADD button and your balance will be deducted.
See also: Guide if using currencies other than USD
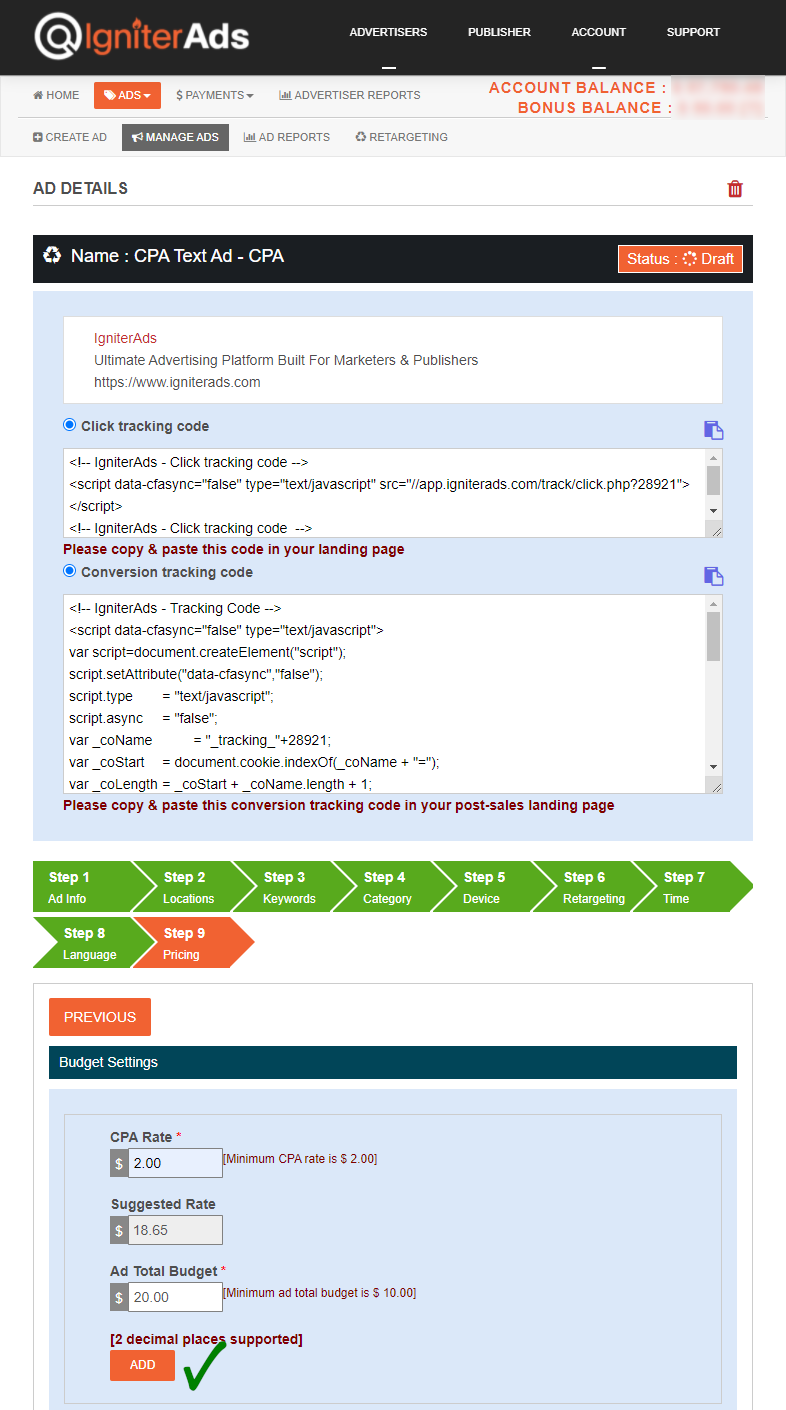
9. There will be a new window that appears to confirm your amount deduction. Click the OK button. Don’t worry, and you can cancel it later on.

10. Right after clicking the ADD button above, your dashboard will be refresh and new ad status will appear. If you would like to cancel the budget, click the BUDGET CANCELLATION button. It will cancel all your previously allocated budget but will not cancel the already running budget that has been used for advertising in the past hours or days.
Later, our team will review your ad and approve it. Finally, we will notify you via email.
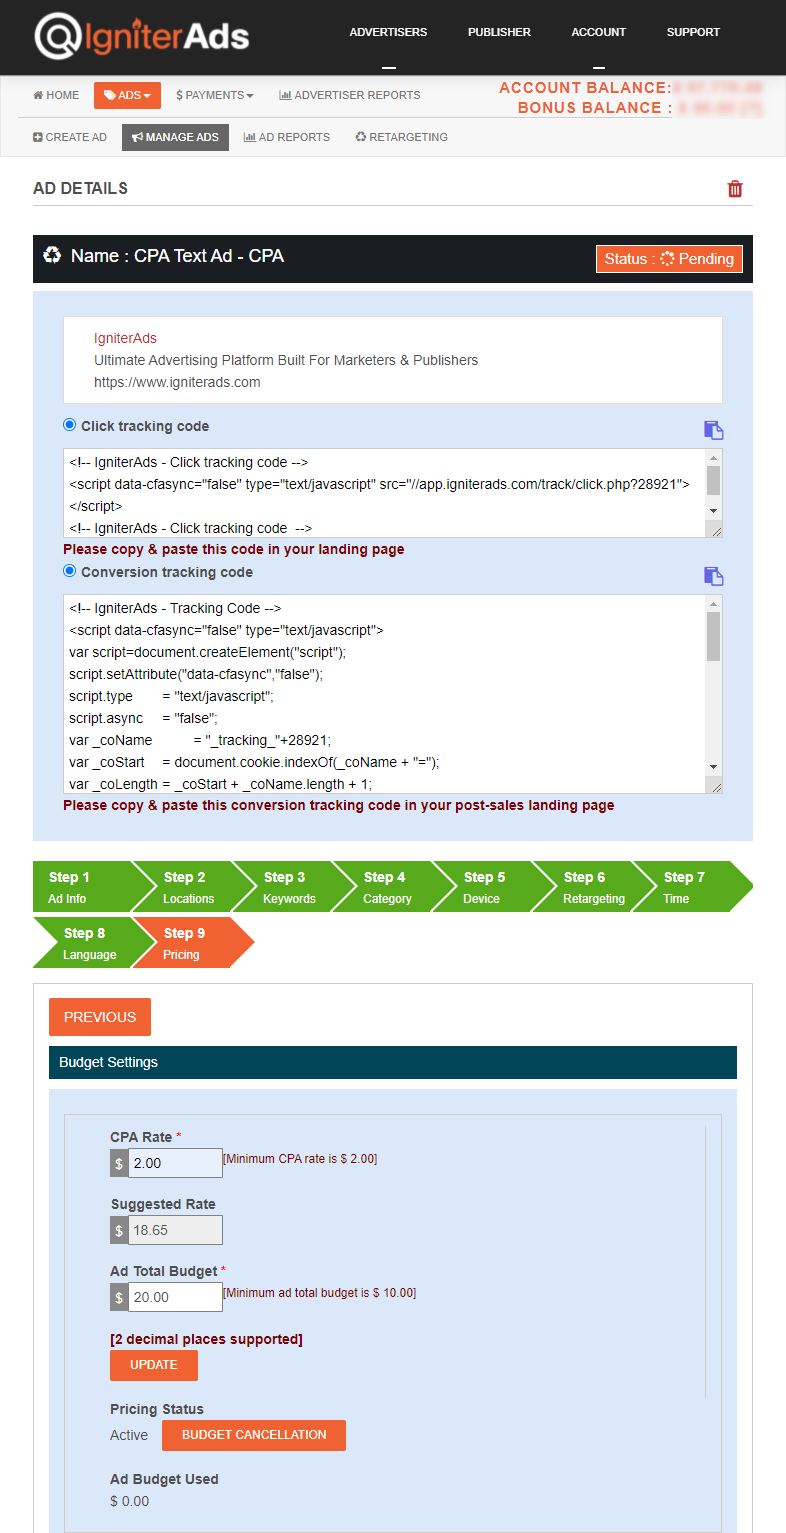
Note: Every time you want to make changes to the ad (even if the ad is already running), you can do so by clicking the UPDATE button at the bottom of any Step.
IMPORTANT:
Please proceed to the next step to embed click tracking and conversion code into your site. Otherwise, you will not be able to track successful conversions. Follow the tutorial below to: