How do I install Native ad code on a Squarespace site?
There are many ways to insert native ad code into your Squarespace based site. But first of all, make sure to add your site before proceeding with this tutorial.
There are several sizes of the native ad that you can choose from:
- 200×200 (most recommended)
- 300×200
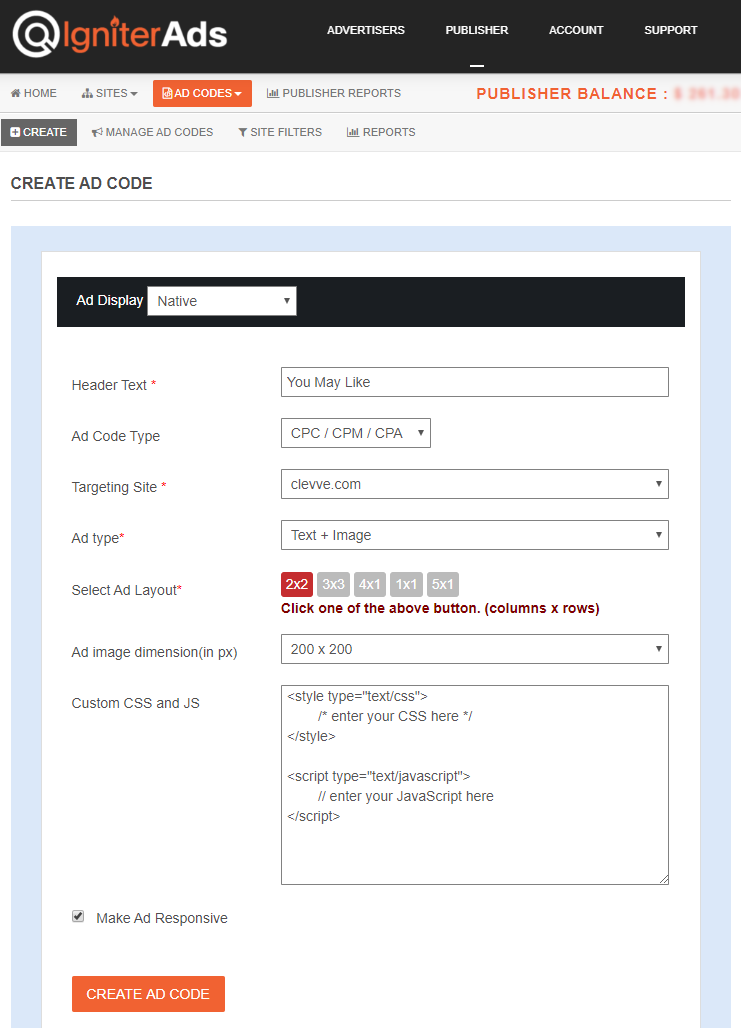
1. First, you need to create an ad code. In the publisher dashboard, select ADS CODES and choose the CREATE button. Enter the information that is required to create a native ad code. Then, click the CREATE AD CODE button.
- Ad Display – choose Native
- Ad Code Type – choose CPC/CPM/CPA
- Targeting Site – choose your added site
- Ad Type – choose Text+Image
- Ad image dimension (in px) – for this tutorial, we will select 200×200
- Custom CSS and JS – leave it as default
- Make Ad Responsive – checked
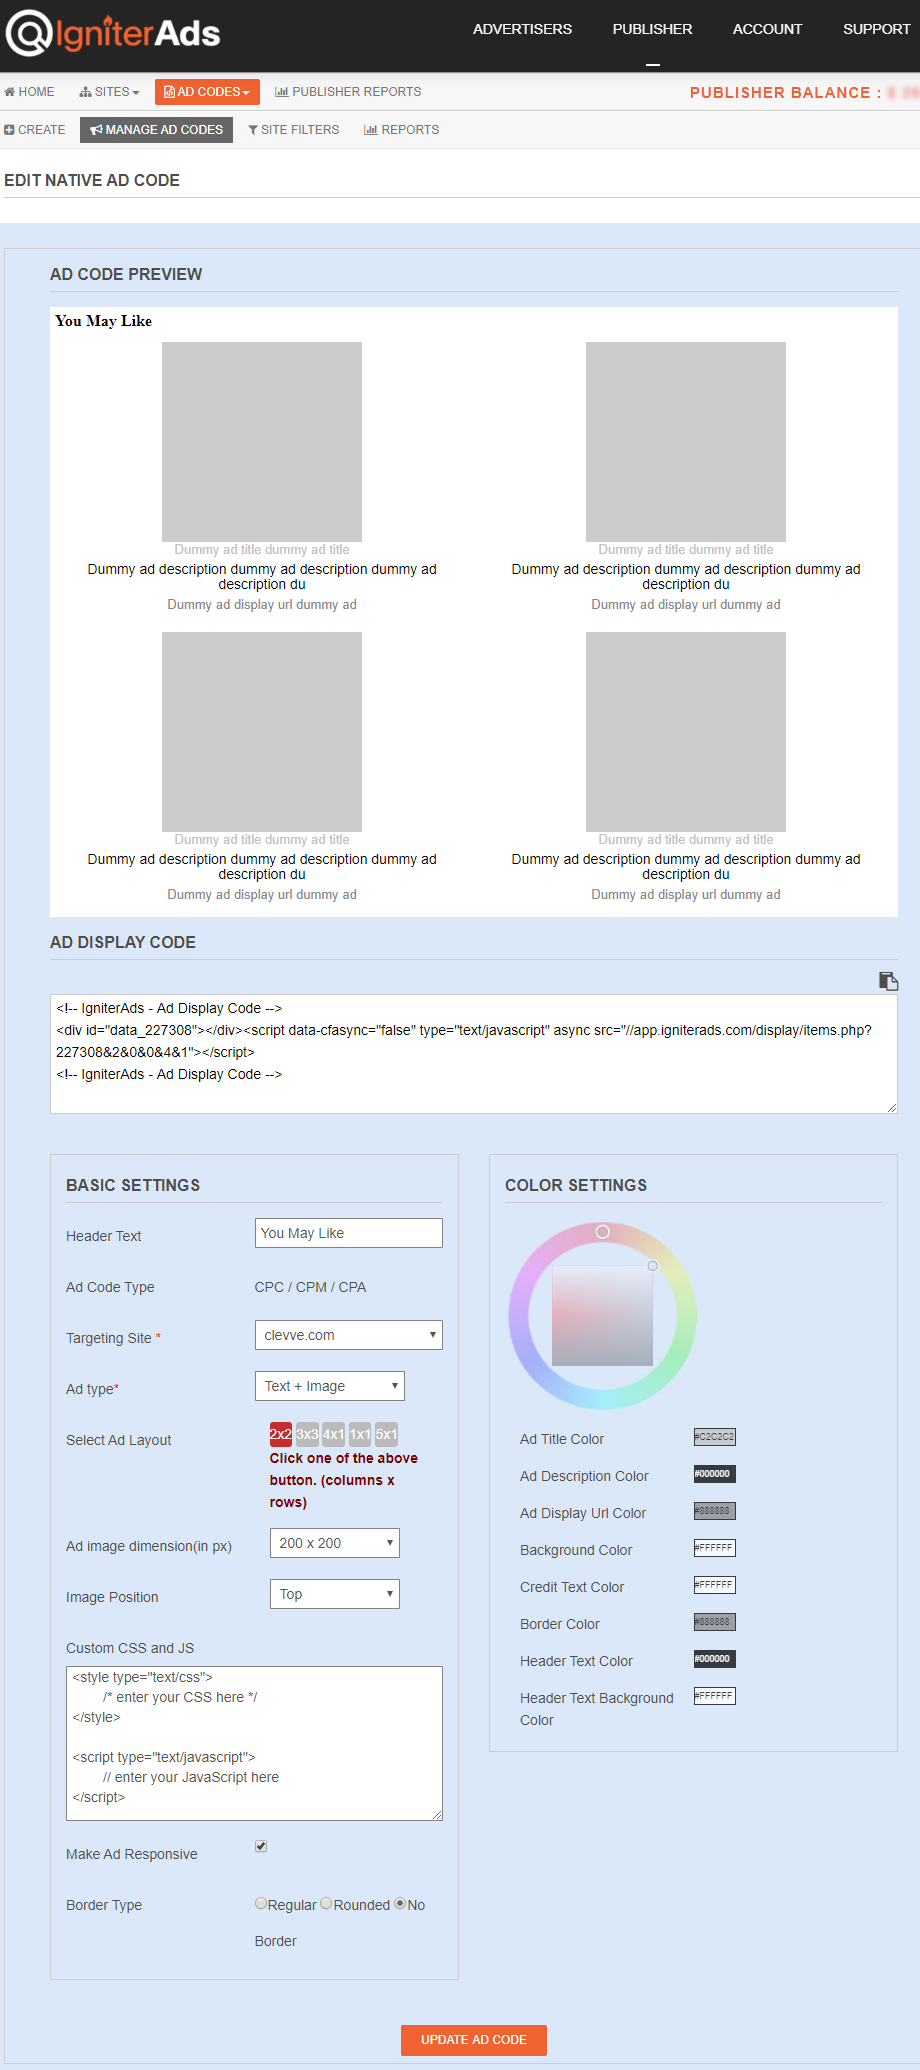
2. After clicking the CREATE AD CODE button, it will direct you to the next page. Copy all the ad code in the AD DISPLAY CODE and paste it into a note or any Wordpad. You can also change the text and background colour and border type, but save the setting by clicking the UPDATE AD CODE button. Please copy the regenerated ad code again.
3. Usually, the trend of inserting the native ad is at the end of a post or footer. Sign in to your Squarespace account. On the left column, choose Pages.

4. Then, select Blog.

5. You will see a button shaped like a gear. Please click the button.

6. A new view will appear. Please select Advanced located at the bottom of the list in the left column. Next, select Post Blog Item Code Injection.

7. Copy and paste the ad code you have copied in (2) above into the space provided. To arrange the native ads in the middle (highly recommended), insert HTML code <center> at the beginning of the ad code and </center> at the end of the ad code. To finish it, click SAVE.

8. Once you click SAVE, your blog page will refresh automatically and you’ll see the results at the bottom of your blog page. You can also place a 300x250px banner (the recommended size) on top of the native ads by following this tutorial. To add space between a banner ad and native ads, place the HTML code <br> between the two ad codes. One <br> equals to one space. For two spaces, add another <br>.
Note: We recommend that you include banners with native ads at the bottom of your blog page because Squarespace doesn’t have a method where you can place the Code block between paragraphs that are permanently available for the future new post/page. But if you want to put an ad code in-between-content as well, we’ve provided a tutorial here.

Your first earnings from the native ad will appear in your IgniterAds statistics 24 hours after adding the code. This time is needed for our ad to propagate and to gather an audience.