SHOPIFY: How to add click tracking and conversion code?
This tutorial is very important after successfully creating CPA ads such as banners, shopping, native and many more. Otherwise, you will not be able to track successful conversions. Therefore, please complete both tutorials below.
How do click tracking and conversion codes work?
a. When potential customers click on your ad, they will visit your site and look around the content and products you sell. The IgniterAds system will record their clicks and IP addresses as well as through the cache.
b. Once they purchase your sales items, the conversion code (embedded into your Shopify Checkout) will send data to the IgniterAds system that there were a successful sales and 100% conversion will be recorded.
c. If click tracking is recorded, but no purchase is made, the conversion will not be recorded.
Click Tracking Code
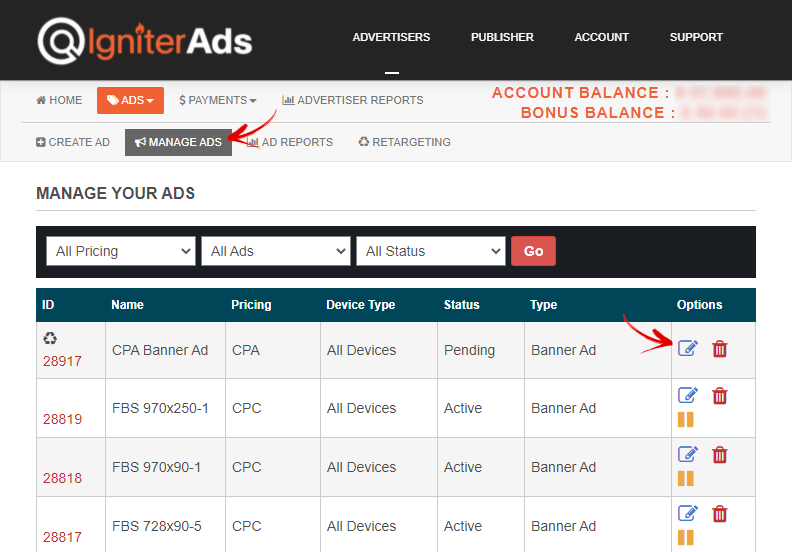
1. Get your click tracking code first through the IgniterAds dashboard in the MANAGE ADS section. Then, click on the pencil icon as shown by the second red arrow in the picture below.
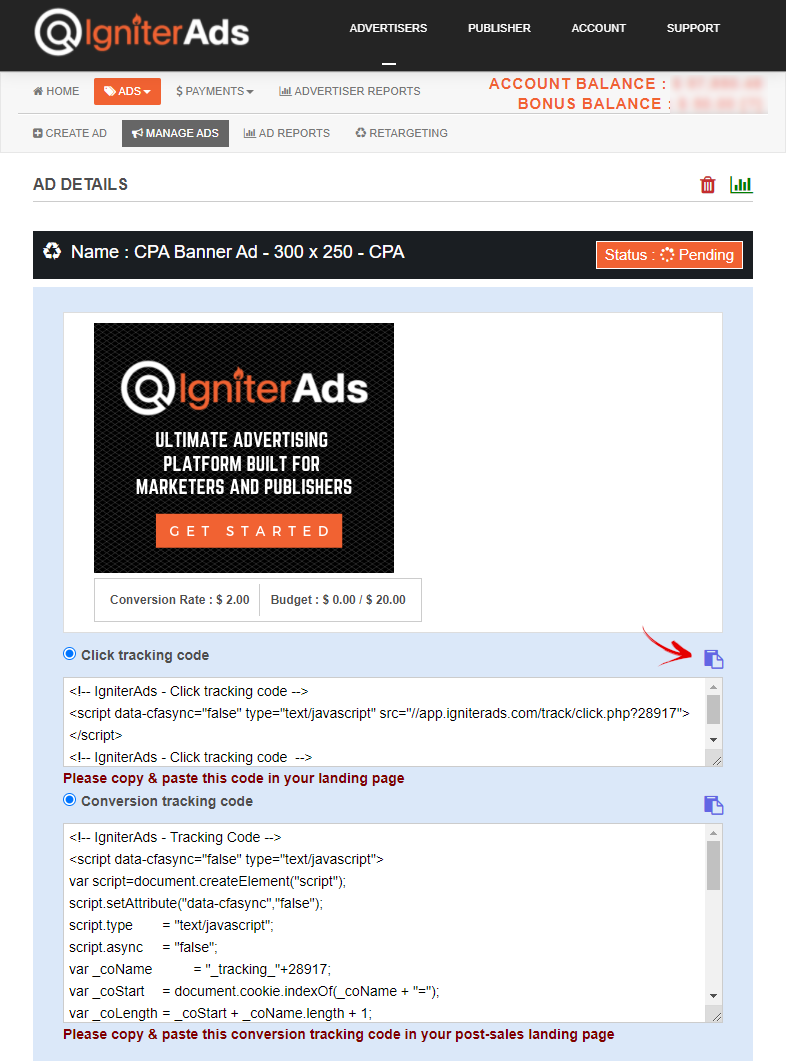
2. You need to copy the click tracking code that will be inserted on the front page of your website. To copy, click the pencil icon as shown by the red arrow in the image below.
3. Now, log in to your Shopify dashboard and click on Themes located on the left column. Then, click the Actions button located on the right column.
4. You will see a dropdown menu. Select Edit code.
5. Then click “theme.liquid“.
6. On the right side, a code will appear for “theme.liquid”. Paste the click tracking code you have copied in (2) above below the <head>. You need to place the click tracking code of the second product below the click tracking code of the first product. And the same method for third and subsequent products. For this tutorial, there are two ads (or two different products) that we want to track the number of clicks and the row numbers involved are 5, 6, 7 and 9, 10, 11 (your row numbers may be different and not the same as this tutorial). So, if you only have one ad (or one product), only rows 5, 6, 7 are involved. Finally, click the SAVE button.
Note: If you have, e.g. 15 ads or products that you want to track the number of clicks, you must insert 15 click tracking codes below the <head> in “theme.liquid”.
Conversion Code
7. Follow the same steps in (1) above. This time copy the conversion code only.

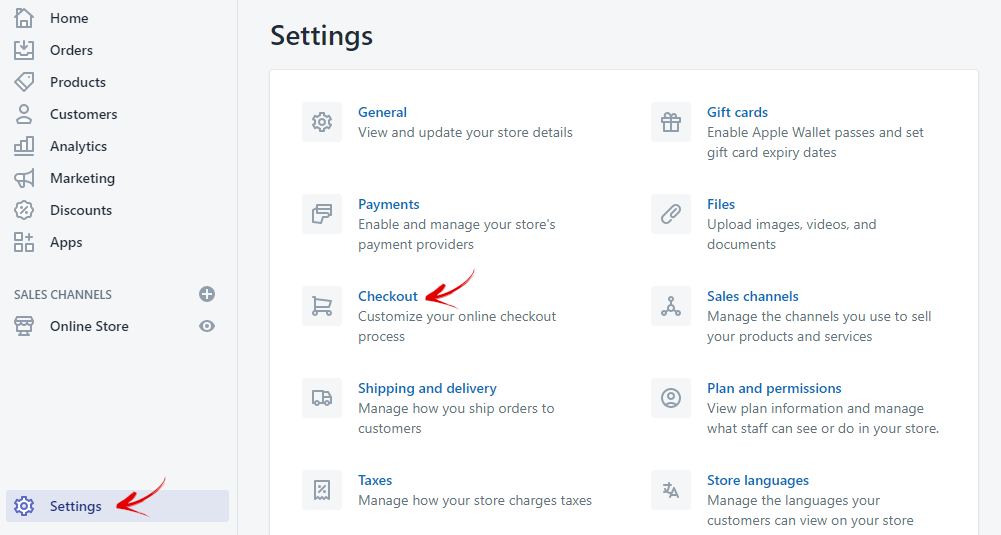
8. On your Shopify dashboard, click Settings in the left column and click Checkout located in the right column.
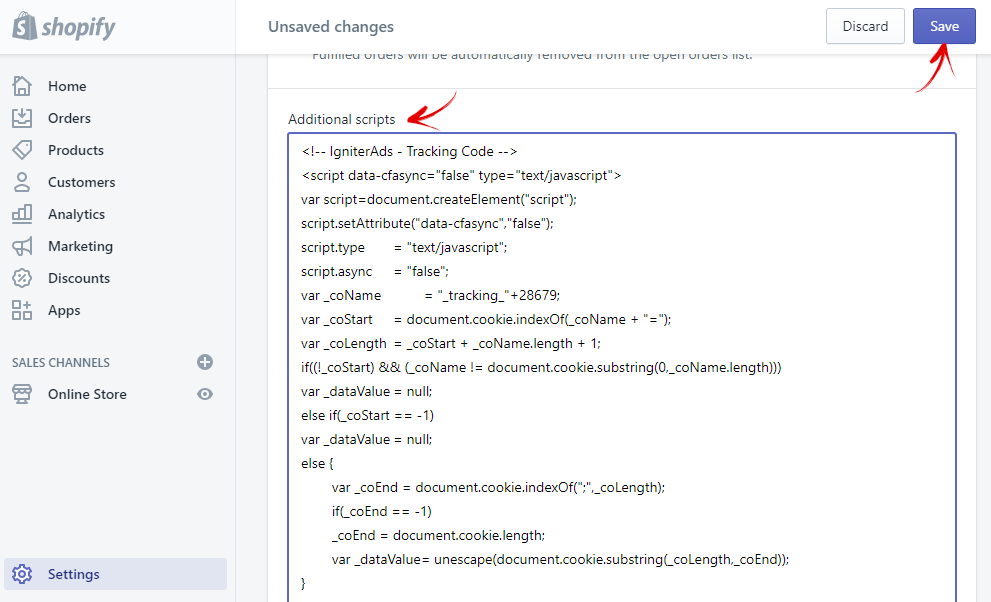
9. Scroll down until you see Additional scripts. Paste the conversion code that you copied in (7) above into the field box. Finally, click the SAVE button.
Note: Similar to when inserting a click tracking code, if you have, e.g. 15 ads or products that you want to track the number of conversions, then 15 conversion codes that are needed to be inserted in the field box. You need to place the conversion code of the second product below the conversion code of the first product. And the same method for third and subsequent products. You should be aware that the conversion code is indeed long. If there is more than one product, the conversion code becomes longer and that is normal.
If you need our help inserting the click tracking and conversion code, please click here.