How do I install text+image ad code on a WordPress based site?
There are many ways to insert a text+image ad code into your WordPress based site. But first of all, make sure to add your site before proceeding with this tutorial.
Note: This tutorial only works for a self-hosted WordPress site and a premium version of the wordpress.com subscription (with its domain). It will not work for the free version of wordpress.com with or without using your domain name.
This is a Text+Image Ad demo if you need to know how does it display on the publisher’s site:
- WordPress
- 300×250 – 1st Most Popular
There are several sizes of text+image ad that you can choose from:
- 300×250 – 1st Most Popular
- 728×90 – 2nd Most Popular
- 300×600 – 3rd Most Popular
- 160×600 – 4th Most Popular
- 336×280 – 5th Most Popular
- 320×100
- 970×90
- 250×250
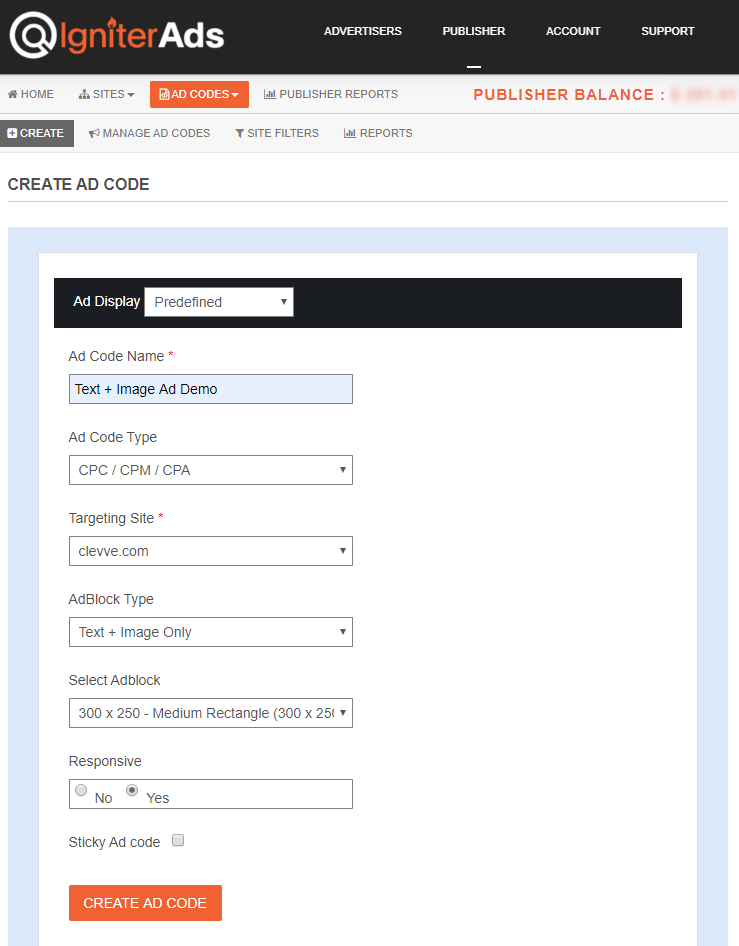
1. First, you need to create an ad code. In the publisher dashboard, select ADS CODES and choose the CREATE button. Enter the information that is required to create a text+image ad code. Then, click the CREATE AD CODE button.
- Ad Code Name – any name (will not be shown to the targeted user)
- Ad Code Type – choose CPC/CPM/CPA (Learn more)
- Targeting Site – choose your added site
- AdBlock Type – choose Text+Image Only
- Select AdBlock – for this tutorial, we will select 300×250
- Responsive – Yes
- Sticky Ad code – Unchecked
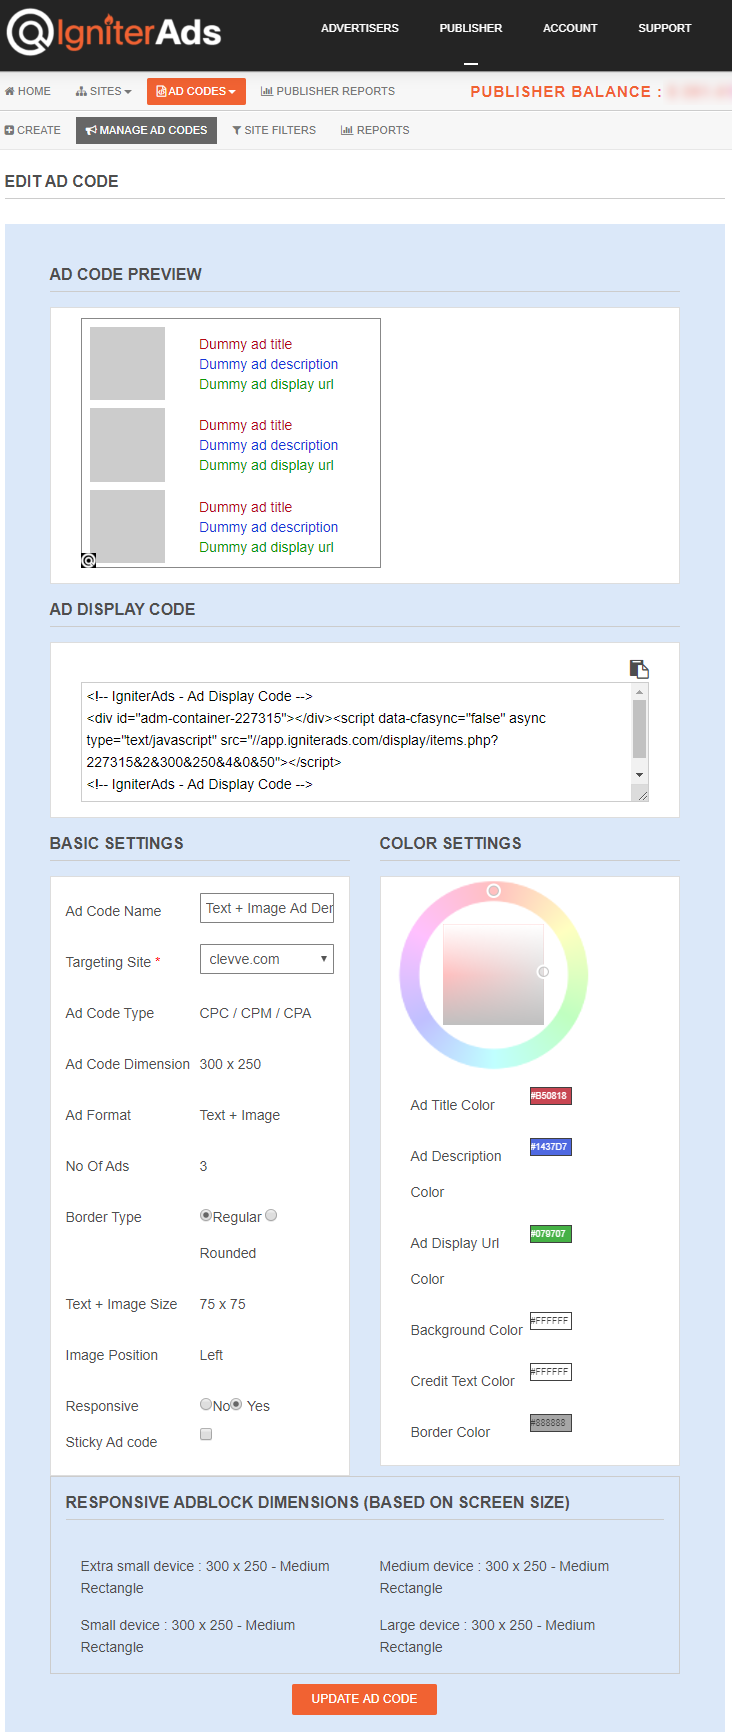
2. After clicking the CREATE AD CODE button, it will direct you to the next page. Copy all the ad code in the AD DISPLAY CODE and paste it into a note or any Wordpad. You can also change the text and background colour and border type, but save the setting by clicking the UPDATE AD CODE button. Please copy the regenerated ad code again.
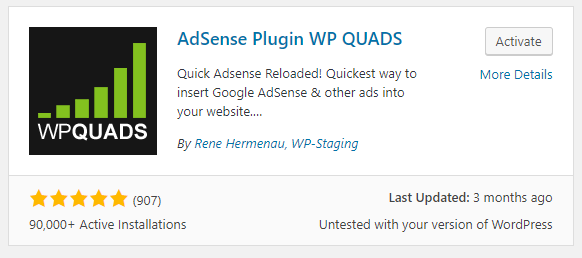
3. To insert the ad code into your WordPress site the easiest way, we will guide you using the WP Quads plugin for WordPress. It’s an Adsense and IgniterAds compatible plugin. Please install the WP Quads plugin and activate it. Are you using WordPress version 5 and above? No worries. We have tested it and it works great.
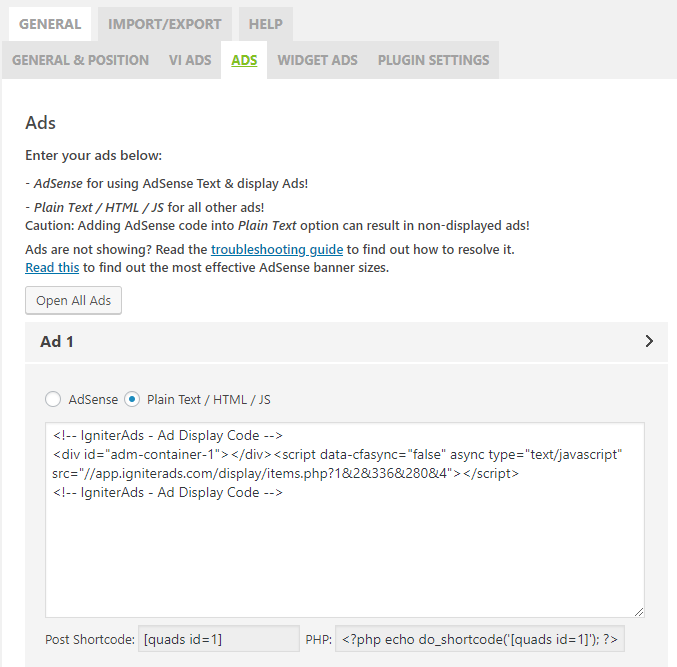
4. Go to your WordPress dashboard. Click the WP QUADS on the left column and choose Ad Settings. Now, copy and paste the ad code into the WP Quads Ad Settings. Make sure to tick the Plain Text/HTML/JS and not the AdSense.
5. For the best result, follow our settings below. We recommend only 3 ads per post or page (Ad 1, Ad 2 and Ad 3).
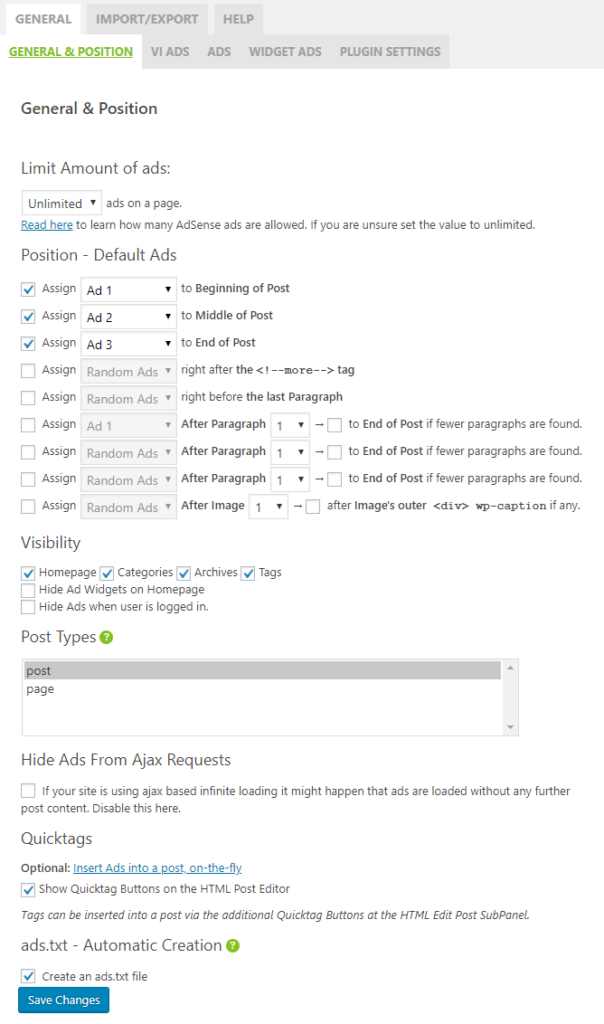
Note: For the Post Types above, you can also enable both post and page.
Blog sidebar
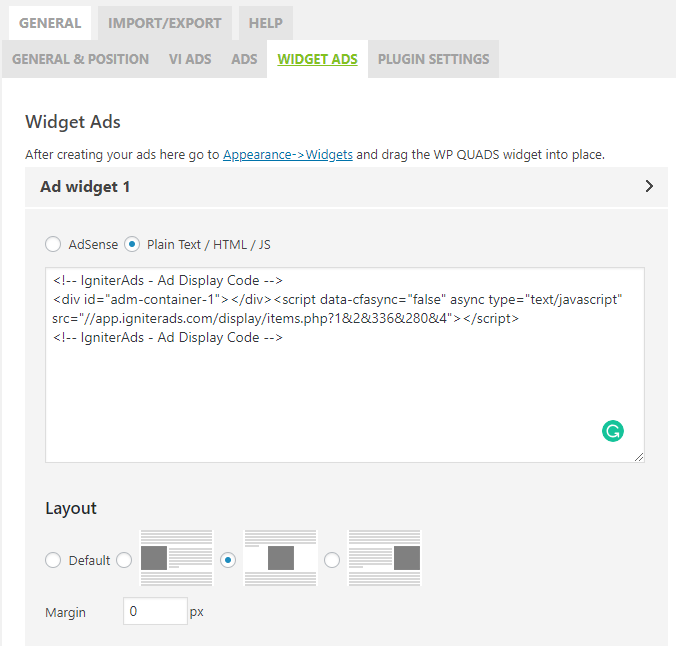
6. You can also place the ad code into your sidebar widget, either left or right. Go to Ad Settings in WP Quads and choose the WIDGET ADS tab. Choose Plain Text/HTML/JS and paste the ad code. Leave the Layout as default (center).
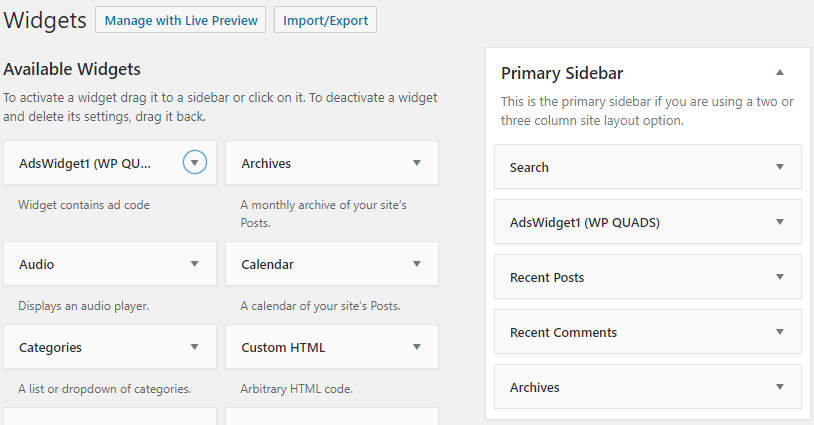
7. Now, on your WordPress dashboard (left column), go to Appearance and choose Widgets. Make sure that the AdsWidget1 (WP QUADS) is already listed in the Primary Sidebar. If not, drag the widget (on the left) into the Primary Sidebar.
This tutorial is perfect for a plain WordPress theme. If you are using a different theme and facing difficulty, please consult the theme developer.