How to Use IgniterAds Retargeting
What is IgniterAds Retargeting?
Retargeting is a form of online targeted advertising directed to users who have visited your website but left without completing the desired action (purchase, deposit, sign-up, etc.).
IgniterAds’ pixel-based retargeting solution helps you reconnect with this audience and show them personalised ads.
How to start using it?
Note: Using a WordPress or Shopify?
1. Login to your IgniterAds Advertiser account. If you haven’t created any Ads, please do so and don’t forget to check the “Allow Retargeting” box.

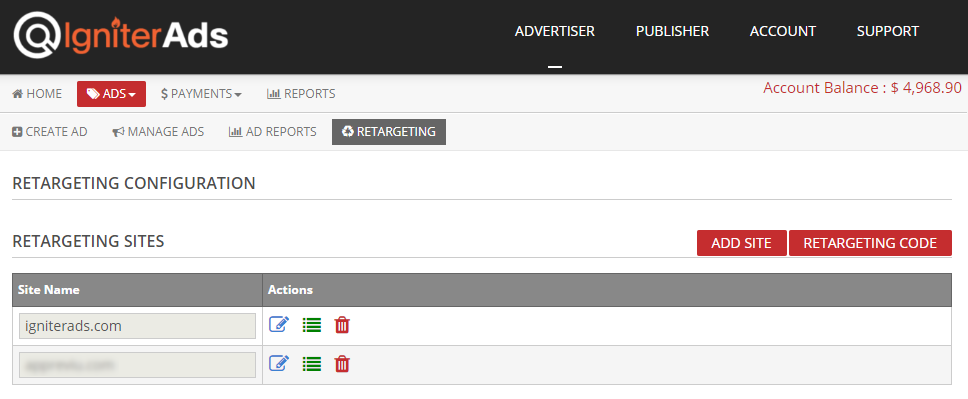
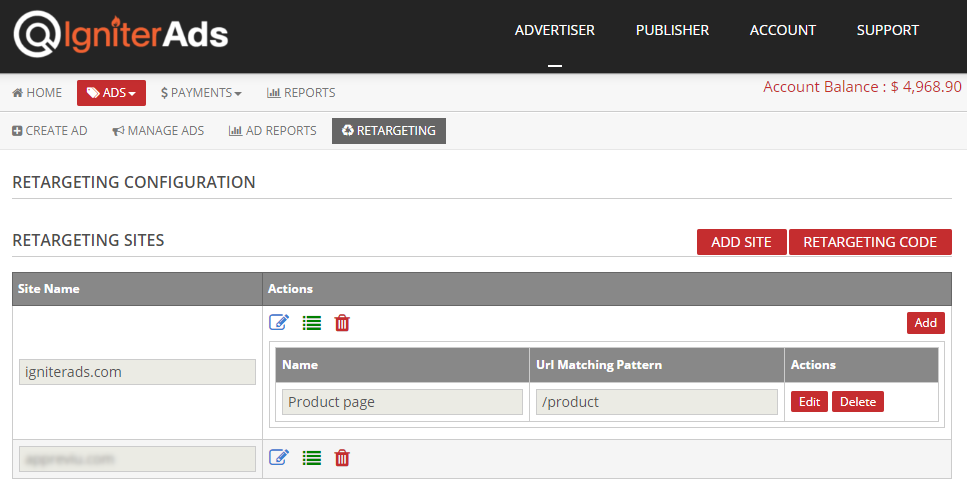
2. Now go to the ADS tab and click RETARGETING.
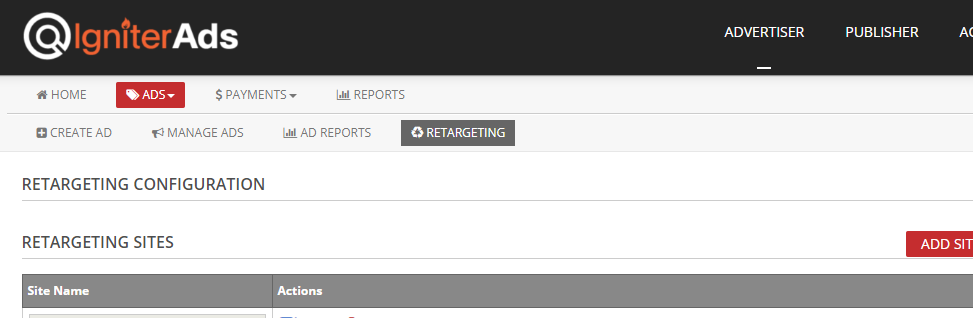
3. Your dashboard will list all of your sites. Click RETARGETING CODE.

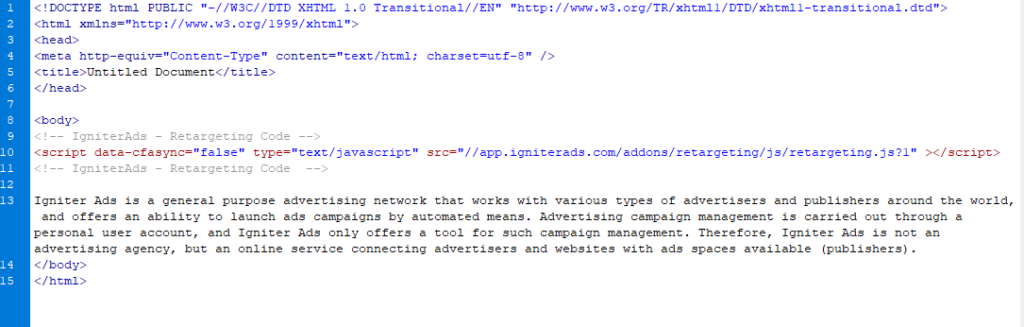
4. A pop-up window with the tracking code will appear. Drag all the codes or CTRL+A, right-click and Copy.

5. Choose the page(s) of your site to collect the audience from which you would like to target and place the code between the body HTML tags (<body></body>) on the page(s).
- You can use the same tracking code on all the pages if you want to add all your site visitors to the same audience.
- If you want to separate the visitors of a specific page(s) into a certain audience, you will have to create a new audience and use a new tracking pixel.
Please note: Make hyper-targeted audiences by using different tracking pixels for visitors to the specific page(-s).
For example, you can create an “abandoned shopping carts” list and remind window shoppers about their incomplete transactions or forgotten goods.
6. As soon as you add the tracking code on your site or pages, it activates automatically and immediately starts collecting data to form your audience.
Please note: We recommend creating a retargeting campaign after you collect at least 30-50 users in your audience.
7. Login as admin in your WordPress dashboard.
8. Go to Plugins and choose Add New.
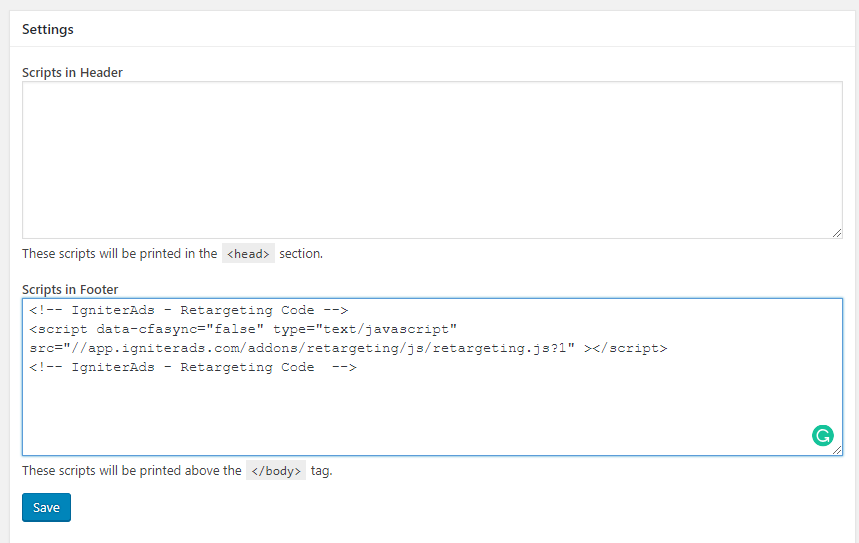
9. Search for “Insert Headers and Footers” and install and activate it.

10. Now go to Settings and choose Insert Headers and Footers.
11. Paste the retargeting codes inside the Scripts in Footer field and click Save.
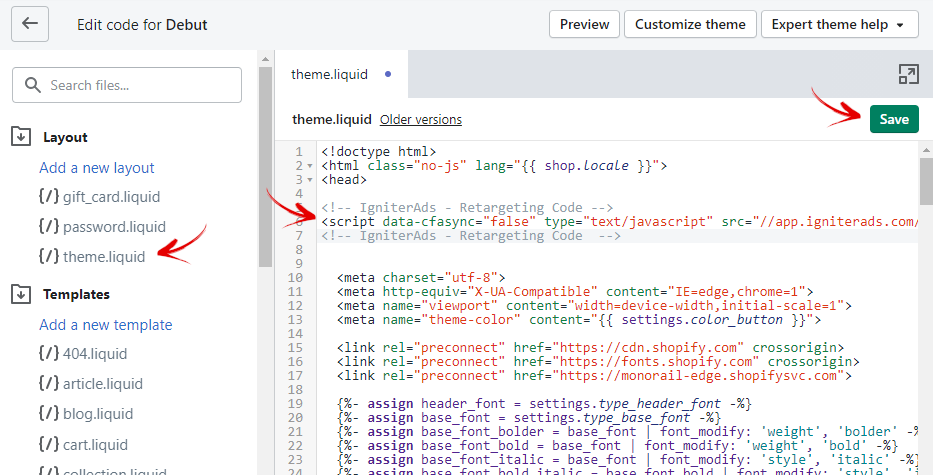
12. Login into your Shopify dashboard and click Online Store on the left pane.

13. Choose Themes, select Actions on the right pane and click Edit code.
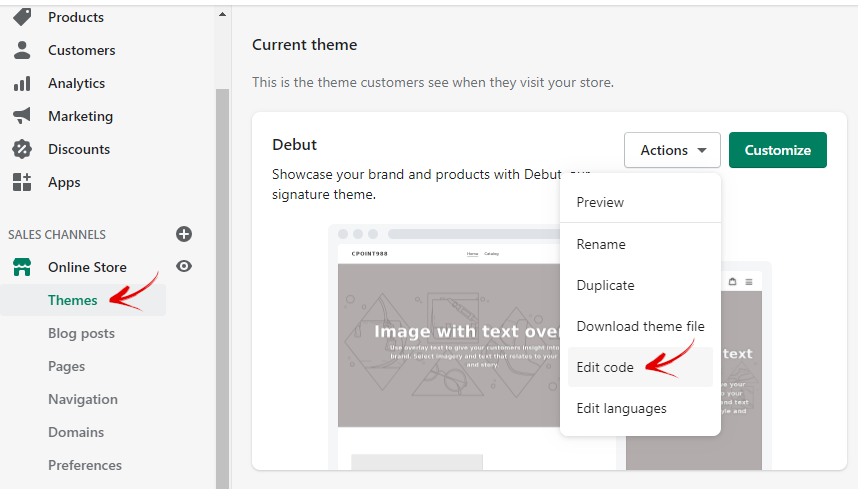
14. Click “theme.liquid” in the left pane, insert the retargeting code and paste it below the <head>. Next, click the Save button.
Retargeting specific pages
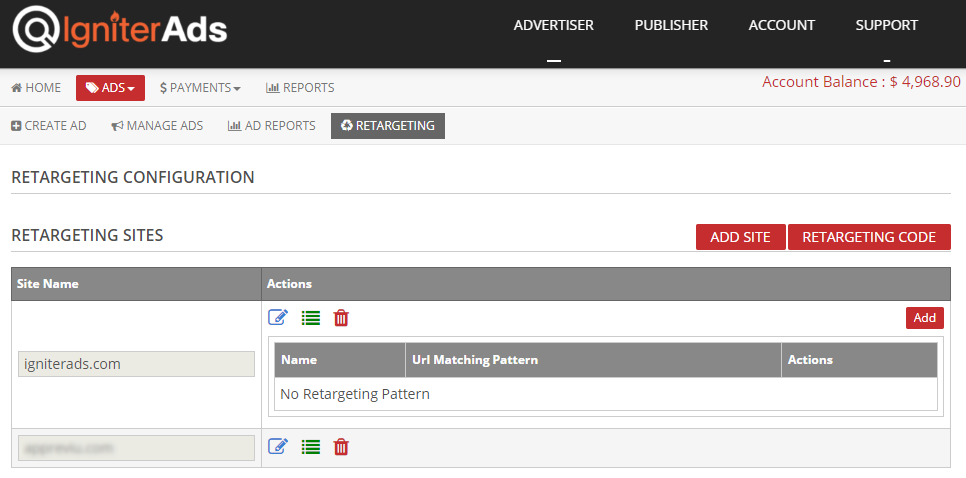
15. You can also retarget a specific page within your site. To do so, expand the Site Name by clicking the green icon (besides the trash icon).
16. It will show you a list of retargeting patterns. For the first time, there is no pattern. To create it, click the Add button on the right.
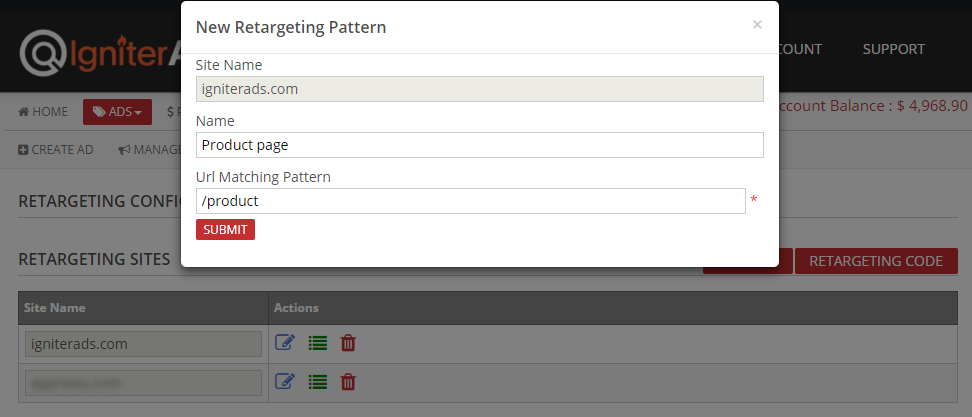
17. Enter any name and it would not be visible to the public. For example, if your page site is www.domainname.com/product, put ‘/product’ into the Url Matching Pattern field.
18. There you go. You can now select the product page in any new ad that you created or currently running.
Congratulations! You’ve started promoting your product using the IgniterAds Retargeting solution!
If you experience any issues installing our pixel or setting the audience targeting, please contact our support team.