How do I install Interstitial ad code on a Blogger/Blogspot site?
There are many ways to insert interstitial ad code into your Blogspot/Blogger based site. But first of all, make sure to add your site before proceeding with this tutorial.
This is an Interstitial Ad demo if you need to know how does it display on the publisher’s site (750×500):
There are several sizes of the interstitial ad that you can choose from:
- 750×500 (recommended for laptop/desktop)
- 400×400 (recommended for laptop/desktop)
- 300×250 (recommended for mobile)
- 300×400 (recommended for mobile)
- 340×480 (recommended for mobile)
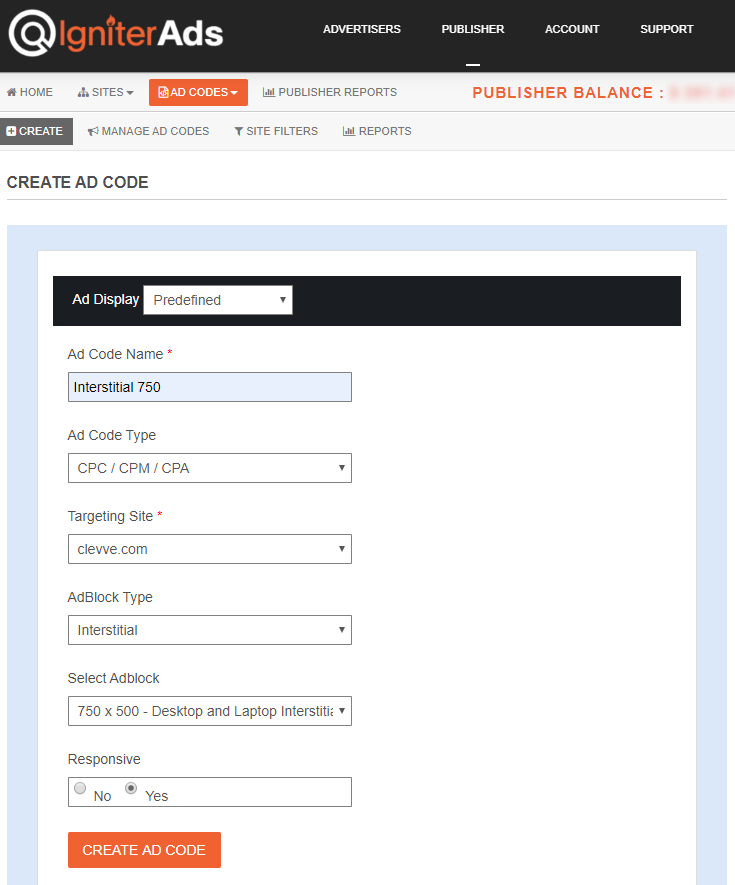
1. First, you need to create an ad code. In the publisher dashboard, select ADS CODES and choose the CREATE button. Enter the information that is required to create an interstitial ad code. Then, click the CREATE AD CODE button.
- Ad Code Name – any name (will not be shown to the targeted user)
- Ad Code Type – choose CPC/CPM/CPA
- Targeting Site – choose your added site
- AdBlock Type – choose Interstitial
- Select AdBlock – for this tutorial, we will select 750×500
- Responsive – Yes

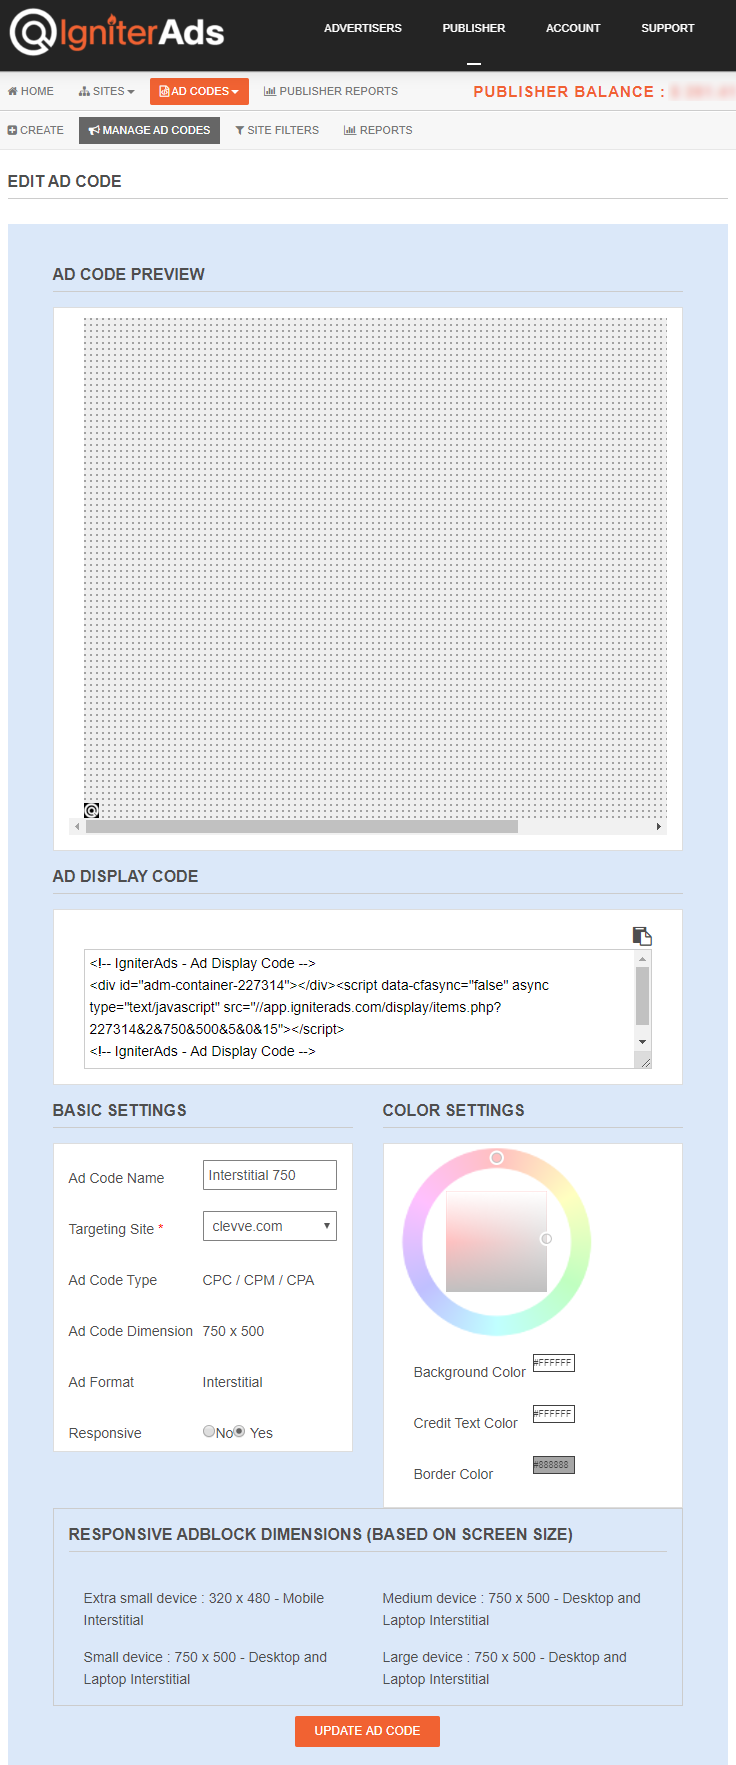
2. After clicking the CREATE AD CODE button, it will direct you to the next page. Copy all the ad code in the AD DISPLAY CODE and paste it into a note or any Wordpad. You can also change the text and background colour and border type, but save the setting by clicking the UPDATE AD CODE button. Please copy the regenerated ad code again.

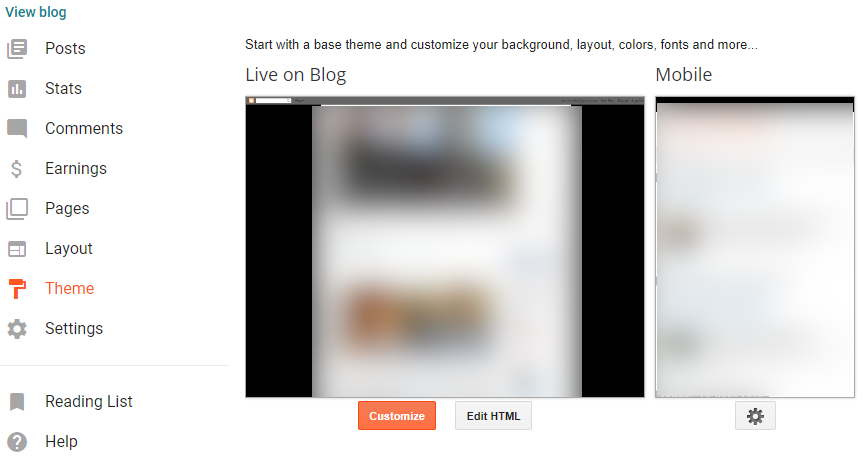
3. Go to your blogger dashboard. On the left column, choose Theme and then click Edit HTML.

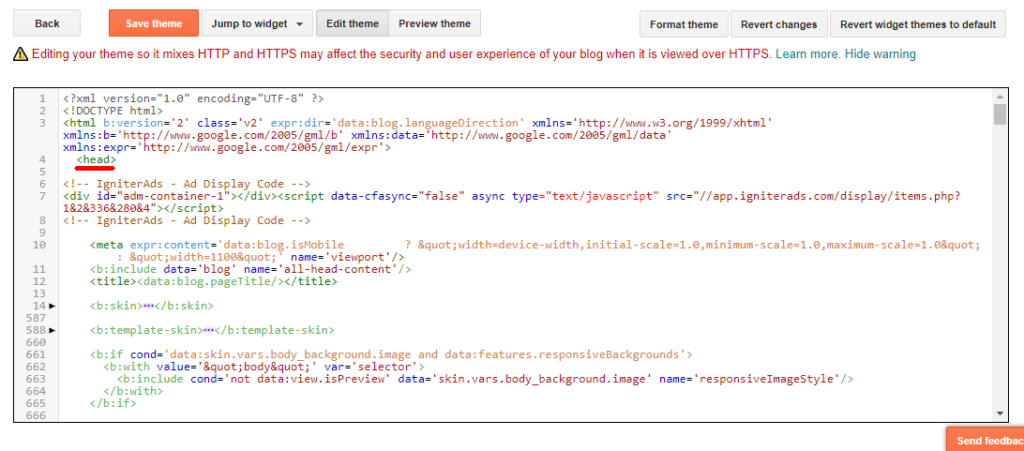
4. Copy the interstitial ad code and place it in the source code of your site right below the <head> tag.

Your first earnings from the interstitial ad will appear in your IgniterAds statistics 24 hours after adding the code. This time is needed to build a subscriber list.